2016年3月17日 星期四

Set up shortcut for python compiler -- .bashrc

It's sometimes annoying when you use python compiler.  Especially you went to some spicily complier.

I used to use python3.4 for my code. but it's not quite fast to type the whole name.

My default python version is Python 2.7.10

[check]

                                                                       
$ python --version                                     


ps: python2.7 是官方認可的最後版本,也是version 2中最終版本。基本上mac系統中都已經內建python系統。

Although use aliases for changing is helpful, once you close terminal or environment , the aliases before you set up will be gone.

More information about 'alias" please check 指令別名設定 -- BASH

So add alias in file-- .bashrc is a key to change environment that you don't need to set up every time at first time opening terminal.

[1. First ]

Find the location and See what python binary executables you have.

                                                                 
$ ls /usr/local/bin/python*                


choose and copy the the complier which you want

[2. Second]

open (or create) the .bashrc file

here i already have this file, so just need to open it.

                                                                                           
$ vi ~/.bashrc                                                                  
                                                                                            

Add new alias to change your default python executable:

                                                                                            
alias = py3='python3.4'                                                


leave the file and source the file:

                                                                                            
$ . ~/.bashrc                                                                    
                                                                                            

check the version:


Reference: How to change from default to alternative Python version on Debian Linux


2016年2月15日 星期一

波比謬思

波比的減肥成功不是出於自願的,而他人的減肥失敗卻是情非得已。
然而,這個人人稱羨的減肥“成功“對他來說卻是一個噩耗。
外界所定義
的“成功“讓他嘗盡所有骨頭,讓波比想當胖子的願望一路走來顛頗無比,
對他來說卻一點也不成功。

人生僅不是如此,


當你的減肥不是出於自願時,何不大步地享受輕盈的跳躍。
當你面對突如期來的失敗時,何不當下享受一道美味的一餐,拋開減肥時無法安心咀嚼障礙呢。


指令別名設定 -- BASH

參考文獻:鳥哥 10.3.1  alias, unalias

I learn Python programming recently. There are many complier i can use for.


I used to use python3.4 but i found this way is too annoying. So, to be speed up coding, i need to typing less words.

Usually, i compile my code like this way:

>> python3.4 xxx.py
--------------------------------------------------------------------

now simplified complier "python3.4" as "Py3":

>>$ alias Py3='python3.4'

--------------------------------------------------------------------

if change back:

>> $ unalias Py3

---------------------------------------------------------------------

check all the simplification

>> alias


===========[學習紀錄]================

ps: 若要改變路徑,參考path 相關文章


2010年9月28日 星期二

給珮妤的一封信

給珮妤的一封信

一年多沒見,沒想到再次見面竟是送你最後一程。
最後一次送你的禮物居然是 眼淚。

多麼不相信這會發生在你身上,因為你看起來是如此的健康。
多麼不想去你的告別式,因為我不想相信你已不在這世上。
我一直在問我自己“為什麼?!“,“為什麼是你?!“

回想起以前高中畢業時,你曾對我說過
“很遺憾我們沒有同班,要不然我們一定可以成為很好的朋友“
那時我很想跟你說,既使沒有同班我們也都是好朋友。

幸運的是老天有眼,讓我們碩班時在淡江的電梯上不期而遇,
更巧的還是我們的實驗室還是在同一層~
禰補了以前沒做過的事,帶給我們許多相處的時間,
一起上廁所、吃飯、跟你去國小實習,
真的很快樂~
還跟你約要一起畢業。
談到人生規劃,你跟我說要先去國小實習,
也想繼續念博班,

但是卻不知當時你早已有病在身,在我面前故坐鎮定,
現在回想起我真的很後悔沒辦法分擔你當時所遭遇的痛苦、疾病。
你的冷靜,你的努力,一直深深烙印在我腦海中。
上天竟這麼的無情、自私,總是把最好的人留在身邊,
剝奪了你跟大家在一起的時間、快樂。

人生的白紙,隨人著色繪出美麗的圖畫,
但白紙的大小卻不能自己決定。

生命竟是如此的脆弱,但意志可以如此的堅強。

你一直是個堅強的女生,總是不讓人擔心,
在另一個世界裡,我相信,
你依然是個出色的天使。
 
2009.6月4日

2010年5月31日 星期一

Install converter

step 1. install MacPorts

step 2. open terminal and type : sudo port install ImageMagick

step 3 . sudo port install ghostscript

done !

[Set up the environment]

cd $HOME

vi .bashrc

================================================

export MAGICK_HOME="$HOME/ImageMagick-6.9.1"

export PATH="MAGICK_HOME/bin:$PATH"

export DYLS_LIBRARY_PATH="MAGICK_HOME/bin/"

:q

================================================

[check]

convert logo: logo.gif

identify logo.gif

display logo.gif


===============================================
create a .gif file :

convert -density 500 -alpha off -delay 50 *.eps _____.gif

-density 500: the gif size

-alpha off : transparency

-delay 50 : output 2 pictures per second. 100 = output 1 picture per second.


source:http://www.imagemagick.org/script/binary-releases.php

2010年3月25日 星期四

How to create a icon for your own self -----如何建立一個屬於自己的icon

如何建立一個屬於自己的icon 圖示?通常大家給的答案幾乎都是去 iconfactory 抓免費的。
如果要漂亮一點的圖就要付費。但是,卻不能保證那些圖都是你要的。
其實建立一個新的icon並不難!只是要讓圖的付檔名變成.icns
actually, it is easy to create a new icon you like! (just change format from .png to .icns)
follow next steps, you will be a creater!

step 1. prepare your picture you like. you can download any picture on the websit or creat your own picture.

step 2. save as .png or .psd

step 3. go to "/Developer/Applications/Utilities" and open "Icon Composer.app"

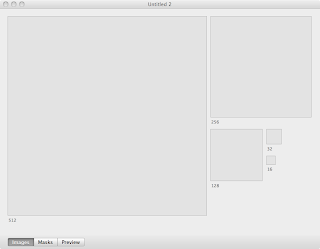
step 4. "file >> New icns" you will see like this:


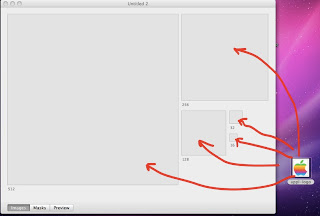
step 5. drag your picture in to the box and filled it.


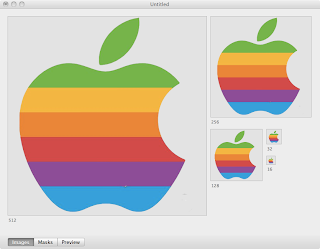
like this :

step 6. save it. "file >> save"

step 7. now you need IcnsRsrc to convert .icns to .rsrc .

step. 8 download and open it. "file >> open >> .icns" than you will get a new icon.

now you can easily change any icon you like !!

drag .ratc to new file which you want to change.

enjoy it !!

參考來源:http://macapper.com/2007/04/21/how-to-create-custom-icons-for-your-mac/

set printer to server for MAC (or Linux)

this way is to link the server printer from MAC to Windows

step 1. open website type "http://localhost:631/"

step 2. enter "Administration --> add printer", choose "Windows Printer via SAMBA" and click continue.

step 3. type "smb://username:password@140.11x.xxx.xx/HP_Color_LaserJet_xxxx" and continue.
ps: username is server name.
password is server password.
140.1xx.xxx.xxx is server IP
HP_Color_xxxxx is the printer's type

step 4. type "Name","Description","Location" whish you prefer to and continue.

step 5. choose the printer type. (for me i choose "HP" ) and continue.

step 6. done! you can go back "Administration --> Manage" print test page to check is it work.

good luck !
if i have time i will put figuer in this in the future.